

Immerse in the thrill of your favorite game by learning how to host a CS 1.6 server. This guide provides step-by-step instructions, ensuring a seamless gaming experience. Perfect for gamers and server enthusiasts seeking to create their own private CS 1.6 server. Let’s dive into this exciting realm of Counter-Strike 1.6 and start hosting!
Table of contents
- Introduction
- Step-by-step Guide on How to Host a CS 1.6 Server
- System Requirements for Hosting a CS 1.6 Server
- Choosing the Server Type (VPS, Dedicated, Game Server Hosting)
- Setting up Your KVM VPS Server: A Step-by-Step Guide
- Step 1: Select the Suitable KVM VPS Server Package
- Step 2: Decide on Your Product Billing Cycle
- Step 3: Choose Additional Resources
- Step 4: Choose Your Operating System
- Step 5: Determine the Number of Backups/Snapshots
- Step 6: Secure Your KVM VPS Server with Login Credentials
- Step 7: Finalize Billing Details and Order Confirmation
- How to Host a CS 1.6 Server on Linux VPS?
- CS 1.6 Server Configuration
- Conclusion
Introduction
For years, The Counter-Strike game has long been a fundamental pillar in the realm of online gaming. Its captivating, team-oriented gameplay has enthralled millions worldwide. One significant element of this gaming experience is having the capability to host your game server. This piece presents an exhaustive guide on how to host a CS 1.6 server. Regardless if you’re a beginner in gaming or a seasoned server host, this detailed instruction will furnish you with the essential know-how to establish your CS 1.6 server. We cover everything, from pre-installation necessities to game settings configuration. Let’s start this engaging quest to build an immersive gaming environment for CS 1.6.
Creating your CS 1.6 server requires a number of procedures including system preparation, software installation, server settings customization, and ultimately, launching and managing your server. This all-inclusive guide will lead you through these processes, granting you a robust understanding of how to host a CS 1.6 server. By the completion of this manual, you’ll have all the tools needed to ensure a smooth and fast gaming encounter for your CS 1.6 players. Time to commence!
Step-by-step Guide on How to Host a CS 1.6 Server
Choosing the right server type marks the beginning of your journey to host a CS 1.6 server. Options range from VPS and dedicated servers such as 5950X Dedicated Server to specialized game server hosting. Your chosen web hosting company typically provides this along with a control panel for easy server management. The control panel serves as a platform where you can install essential server files and adjust settings.
Configuring your server settings forms the next significant step. This includes setting up game rules, player slots, and other game-specific parameters. If you opt for dedicated or virtual private servers, you gain complete control over these configurations, allowing you to customize your CS 1.6 world. The final step involves launching your server. Before making it live, conduct thorough testing to identify and fix potential issues. Ensuring regular maintenance is paramount for providing a seamless gaming experience. Note, each of these steps consists of more specific actions that we’ll delve into in the subsequent sections.
System Requirements for Hosting a CS 1.6 Server
Understanding the system requirements is a pivotal step in your journey to host a CS 1.6 server. It’s important to ensure your hosting server possesses the necessary system resources, including a capable processor, sufficient RAM, and appropriate storage, for a lag-free and seamless gaming environment. While CS 1.6 isn’t particularly resource-demanding, hosting it does call for a certain degree of computational power. A dual-core processor and at least 1GB of RAM are recommended to keep the game running smoothly under full server load.
A reliable internet connection with a sufficient upload speed is essential. A minimum upload speed of 1Mbps is recommended. Remember that a larger number of players requires more resources, so the capacity of your server should be a key factor to consider when selecting your hosting solution.
Choosing the Server Type (VPS, Dedicated, Game Server Hosting)
Selecting an appropriate server type is a pivotal decision when figuring out how to host a CS 1.6 server. Options range from Virtual Private Servers (VPS), Dedicated Servers, to specific Game Server Hosting solutions. Every option has its advantages and disadvantages, catered towards different needs, budgets, and the scale of your gaming hosting plan.
Virtual Private Servers (VPS) provide a balance between cost-effectiveness and performance. They’re an ideal choice for those starting a small to mid-size gaming community. Dedicated servers offer maximum control, performance, and customization. They suit larger communities and offer the best gaming experience.
Game Server Hosting services cater specifically to gamers. Many come with built-in tools and configurations for popular games like CS 1.6. Some game server hosting services even provide a control panel for easy management. Despite being slightly costlier, they offer optimal performance for gaming, making them a good investment.
Understanding the characteristics of each server type is crucial. It helps in choosing a hosting solution that aligns with your requirements and facilitates a smooth CS 1.6 server hosting experience.
Setting up Your KVM VPS Server: A Step-by-Step Guide
Embarking on the journey to set up your KVM VPS Server is a detailed process. This guide provides a roadmap for users to navigate this task, covering critical aspects from choosing the right server package tailored for your unique needs, to security measures such as selecting robust login credentials. With an emphasis on customization and flexibility, you will learn how to select additional resources, determine the number of backups, and manage your billing details. Designed to equip you with the skills and knowledge needed to independently set up a server, this guide makes the complex process accessible to all users.
Step 1: Select the Suitable KVM VPS Server Package
Begin the setup process by picking the appropriate server package. As KVM VPS Server is a versatile platform, ensure you opt for a package that offers sufficient resources for optimal performance. Look for hosting providers that propose cost-effective VPS hosting packages crafted to meet the specific needs of KVM VPS Server users.
€ 2.99
First Month
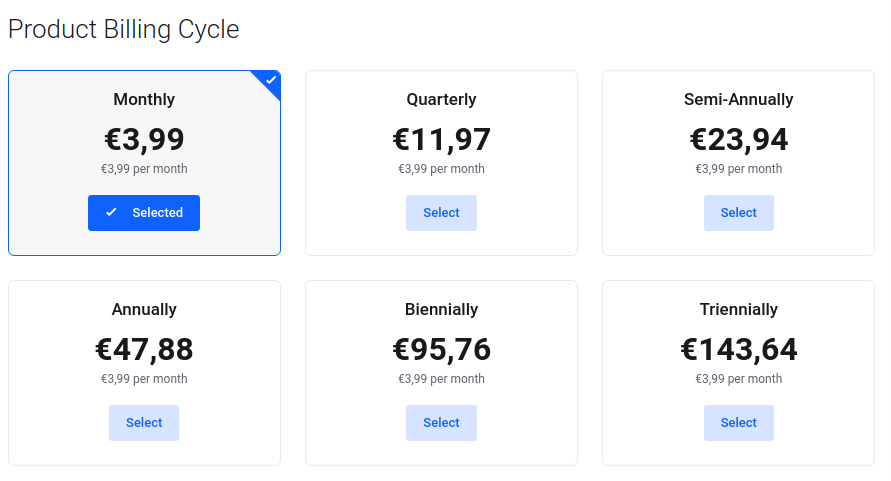
Step 2: Decide on Your Product Billing Cycle
The next phase of the setup involves selecting a suitable product billing cycle.
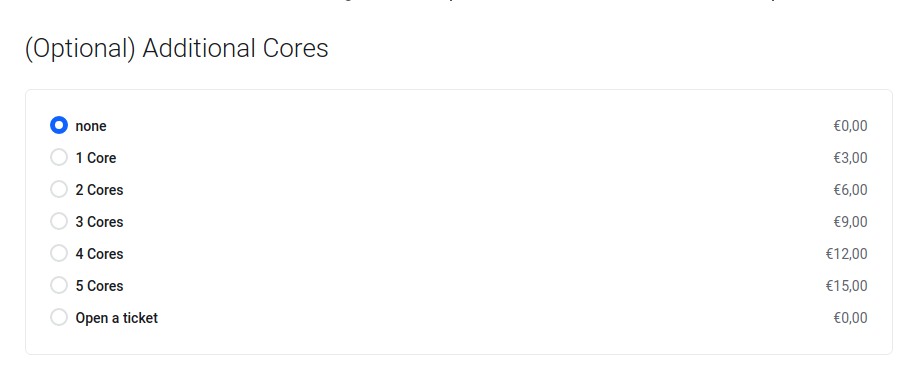
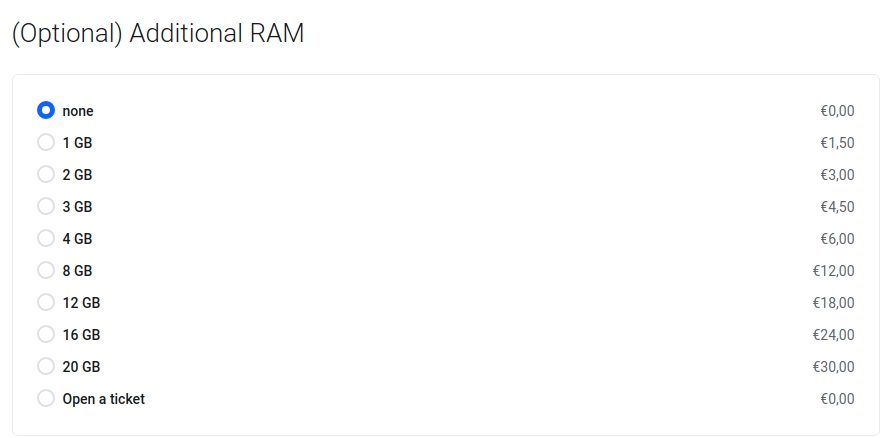
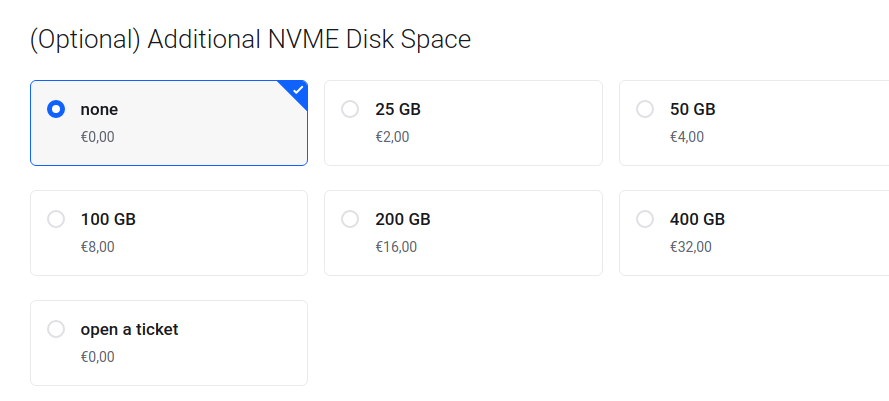
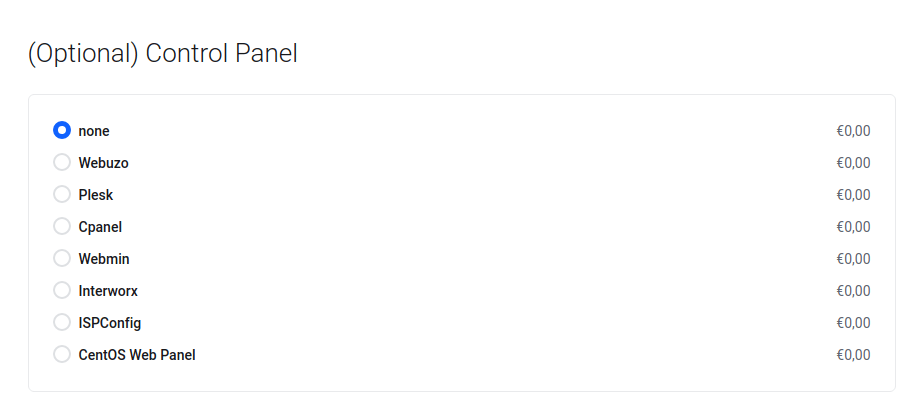
Step 3: Choose Additional Resources
Add any required resources like extra cores, RAM, storage space, or your preferred control panel to your package.
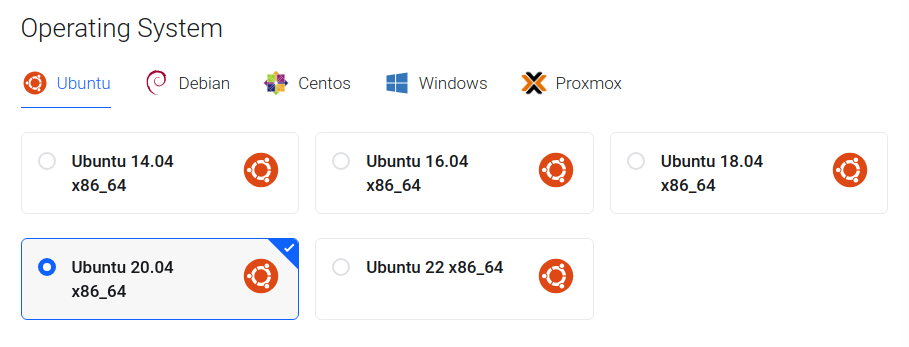
Step 4: Choose Your Operating System
The next crucial step is to decide on your operating system. Opt for a system that offers wide compatibility, robust security features, and a user-friendly interface.
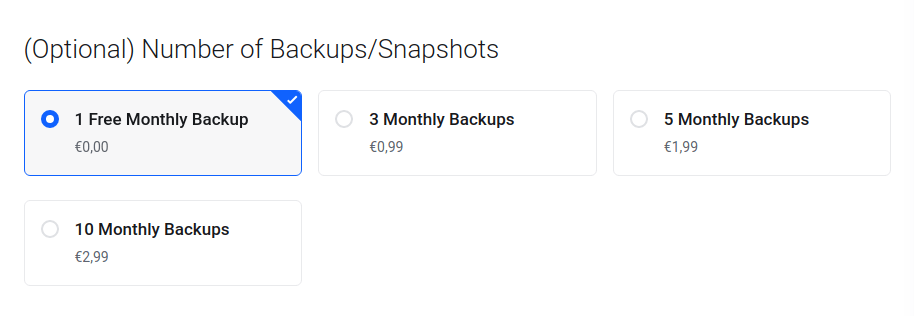
Decide the number of backups or snapshots needed. They serve as a safety net for quick recovery in case of data loss or server failure.
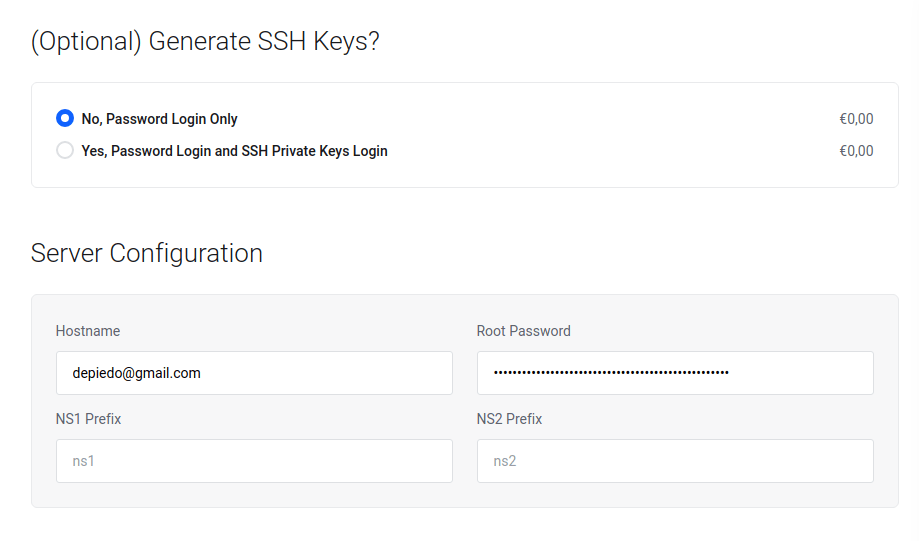
Step 6: Secure Your KVM VPS Server with Login Credentials
Security is paramount. Set a strong and unique password for your login credentials. Always ensure these credentials are securely stored and consider changing the initial password to bolster security.
Step 7: Finalize Billing Details and Order Confirmation
If you are not an existing customer then please create a new account by filling up the required fields.
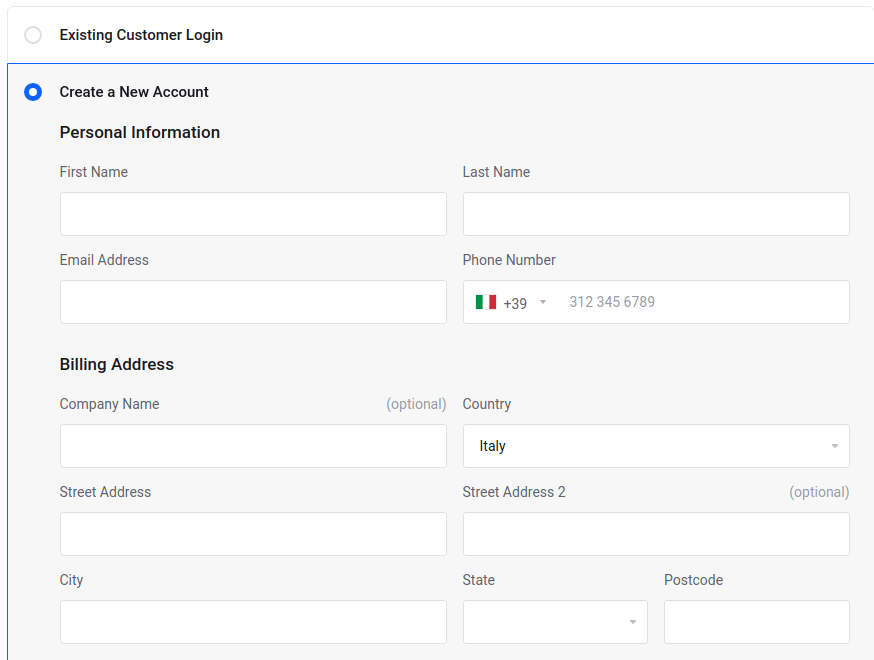
We provide multiple payment methods so our customers can pay easily, you can select the desired payment option and fill up the details

Mark as a tick on the option of Terms & Service and then click on Checkout.
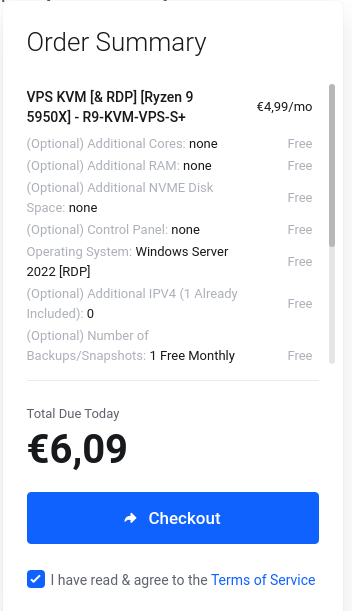
Once the order is confirmed, then our system will automatically create the VPS Server and send you login credentials to the email.
How to Host a CS 1.6 Server on Linux VPS?
To host CS 1.6, it is necessary to download and install the Half-Life Dedicated Server (HLDS). This can be accomplished through various hosting solutions or by manually downloading it. Once the HLDS is installed, your server will be prepared to host the game and can able to access it globally if ports are forwarded. From there, you can customize the game settings to your liking using the control panel provided by the server.
Remember, server management includes regular maintenance and updates to ensure a seamless gaming experience. Opting for a game server hosting service can help with this aspect. They offer specialized services for maintaining game servers, leaving you free to enjoy your CS 1.6 gaming sessions.
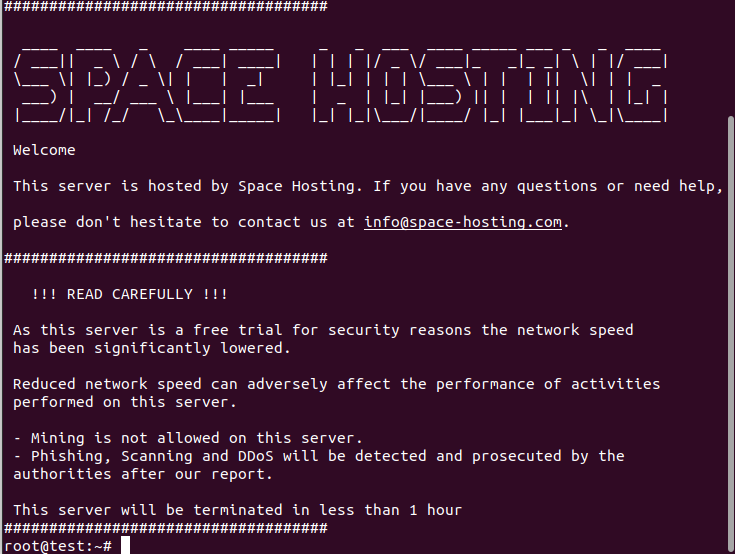
Step no.1: Connect to your Linux VPS
If you bought a server from Space Hosting, then you will receive server credentials via email with the subject name “VPS Created”. Windows users can effortlessly establish a connection to their VPS by utilizing software like PuTTY. On Mac or Linux, the built-in terminal will fulfill the same function.
After launching your preferred software, input the VPS IP address in the required field. Next, provide your login credentials. This usually includes the username and password provided by your hosting services. Once you’ve correctly entered the details, your SSH connection to the VPS should be established.
Remember, it’s essential to keep your VPS login credentials secure. In the wrong hands, they can compromise your hosting account, leading to potential disruptions in your CS 1.6 server. Maintaining good security practices is an important aspect of hosting any server, including CS 1.6.
Step no.2: Update Server and install Dependencies
This step ensures the optimal functioning of your CS 1.6 server. To start, connect to your VPS using the SSH connection. Once logged in, issue commands to update your Ubuntu Server’s package list.
Following the successful update of the package list, you’ll need to install dependencies for HLDS. This includes libraries and software that HLDS requires to function properly. For example, you might need to install software such as screen, which allows you to manage multiple terminal sessions from one window.
This step also requires installing updates for your Ubuntu Server itself. These updates are important to ensure your server operates efficiently, securely, and is compatible with all required software. At this point, you’ve updated your Ubuntu Server, installed dependencies, and are ready to proceed further in hosting your CS 1.6 server.
Type the following commands one by one on server terminal
apt-get update -y
apt-get upgrade -y
dpkg –add-architecture i386
apt-get update
apt-get install lib32gcc1
apt install lib32gcc1 lib32stdc++6 libc6-i386 libcurl4-gnutls-dev:i386 libsdl2-2.0-0:i386
Step no.3: Install HLDS-CS 1.6 Server on Linux VPS
After successfully establishing an SSH connection with your VPS, the next step in hosting a CS 1.6 server is to install the Half-Life Dedicated Server (HLDS). The HLDS serves as the backbone for your CS 1.6 server. Begin by updating your system’s packages to ensure compatibility with HLDS. To install HLDS on your Linux VPS, follow these instructions. You can access the command line via your SSH connection.
Type the following commands one by one in the server terminal
- Create the HLDS Directory and access it
mkdir hlds
cd hlds- Download the steamcmd in order to download the required cs 1.6 server files
wget https://steamcdn-a.akamaihd.net/client/installer/steamcmd_linux.tar.gz- Extract the downloaded steamcmd_inux.tar.gz file
tar xvfz steamcmd_linux.tar.gz- Start the program and download the updates of steamcmd
./steamcmd.sh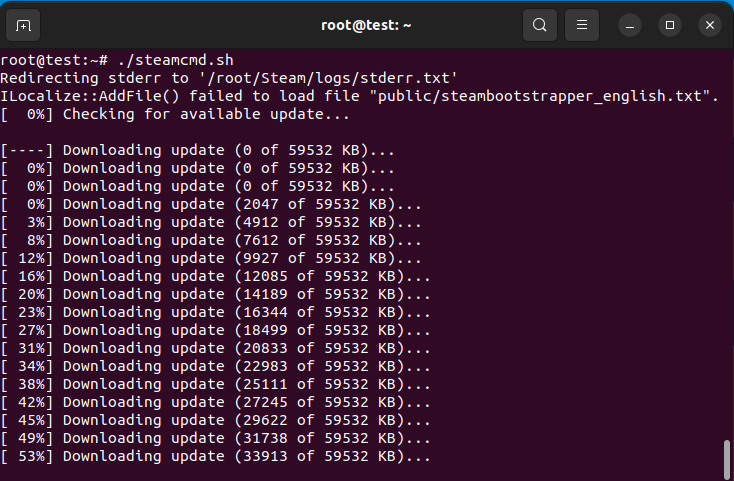
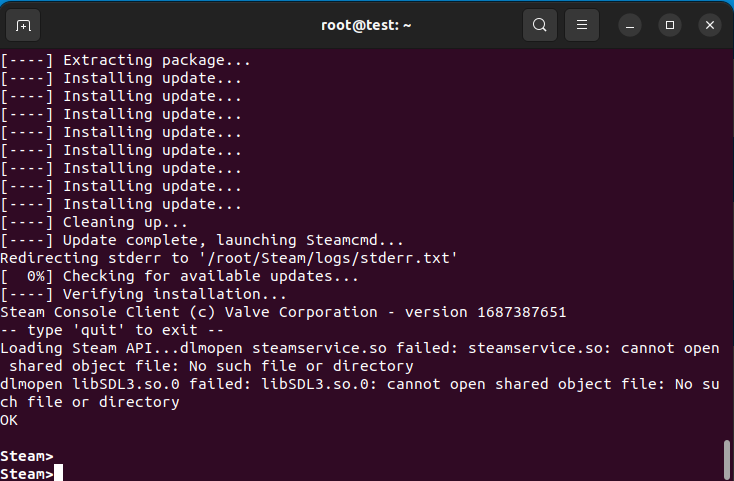
- Once you will see the Steam> terminal screen then it’s time to download cs 1.6 required files
force_install_dir /root/hlds/
login anonymous
app_update 90 validate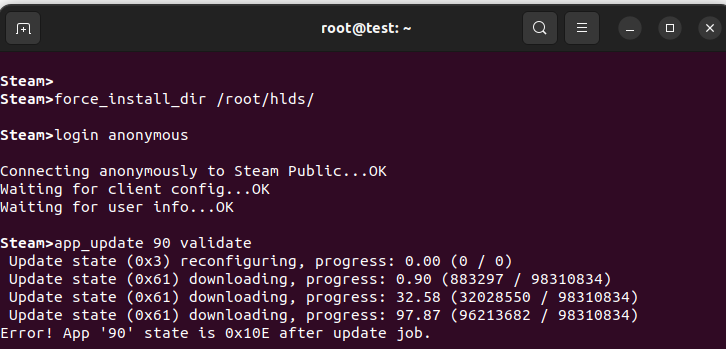
- If you faced the Error! then type the following command again
app_update 90 validate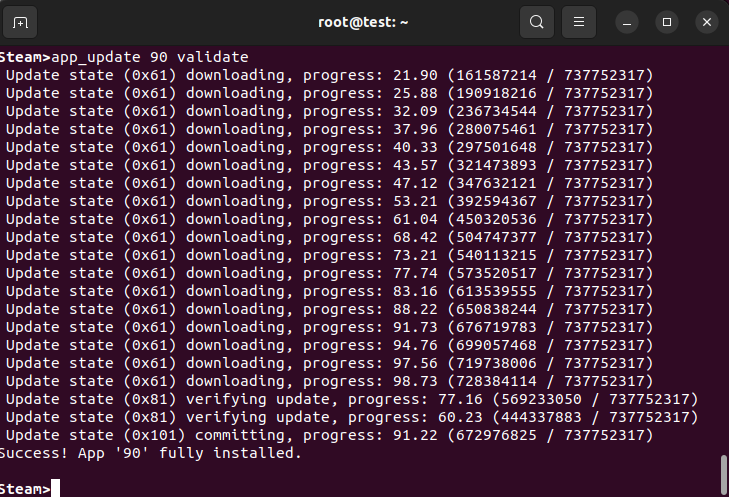
Once you will see the Success! message then it means cs 1.6 server successfully installed, now it’s time to start the server.
Step no.4: Start HLDS-CS 1.6 Server on Linux VPS
After completing the previous steps, you’re now ready to start your CS 1.6 server using HLDS. Initiating your server is the final step to host a CS 1.6 server on a Linux VPS. To begin, you should use the command line from your SSH connection. Launch the server by navigating to the directory where HLDS was installed and executing the appropriate start-up command.
It’s vital to ensure that your server is configured correctly before starting it. Be attentive to details such as port configurations, server name, and other essential settings. Once your server is active, it will appear in the server list of the CS 1.6 client software. Here, players can find and join your server, allowing you to host your own CS 1.6 games.
Once everything is configured then please type following command in order to start the server.
./hlds_run -game cstrike +ip 0.0.0.0 +maxplayers 12 +map de_dust2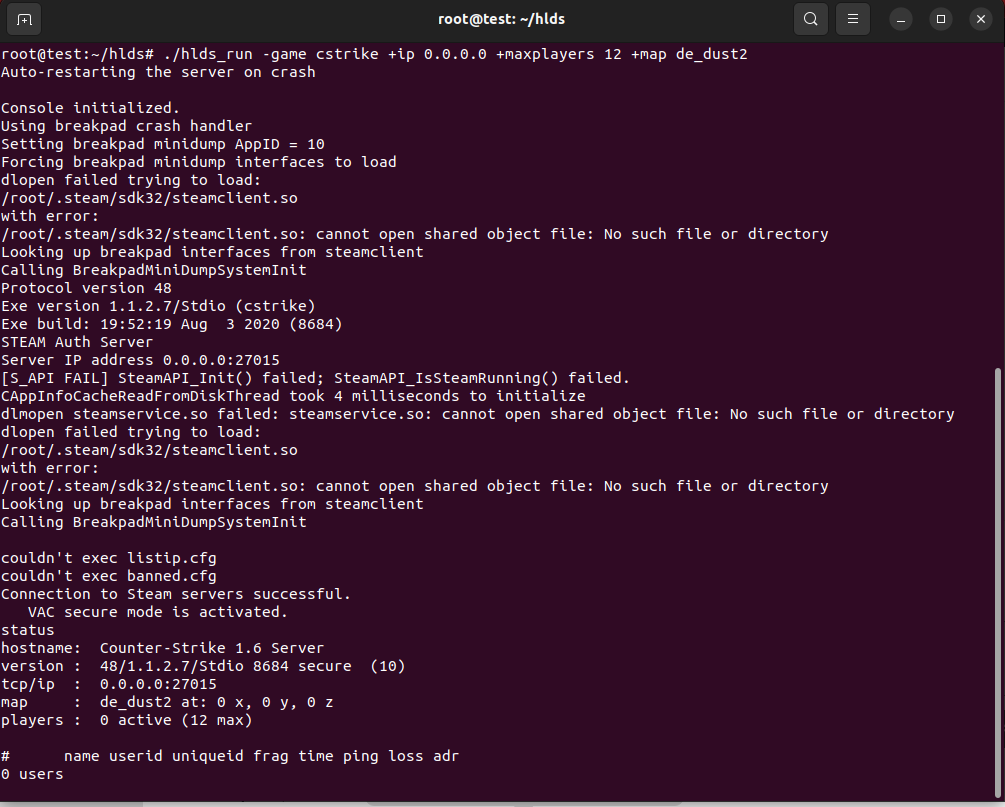
Now your server is succesfully started and easily accessible through VPS Public IP
Step no.5: Connect to your CS 1.6 Server
Once you start is started without any crashes then it means you can now easily connect to your server using VPS Public IP.
- Launch the Counter-Strike 1.6 Game
- Open the console by pressing button ` (button under esc)
- Type the following command on console:
connect YourVPSPublicIP:27015
e.g
connect 181.214.147.224:27015- Now the game will establish the connection to your CS 1.6 server
As a server admin, it’s crucial to monitor your server’s performance once it’s up and running. Issues may arise that require your intervention. It’s possible you’ll need to restart the server occasionally to maintain optimal performance. Regular software updates are also essential. The good news is that most hosting services provide control panels for managing these tasks easily. By the end of this step, you’ll have a fully functional CS 1.6 server hosted on your Linux VPS.
CS 1.6 Server Configuration
The process of setting up a CS 1.6 server doesn’t end at starting the server. Configuring the server to suit your gaming preferences forms an essential part of learning how to host a CS 1.6 server. Central to this configuration process is the use of server.cfg file and plugin management systems like AMX Mod X.
Your server.cfg file acts as a control panel for server settings. You can configure game mechanics, such as round time, friendly fire settings, and more. It’s a powerful tool allowing customization of your server, enhancing the gaming experience. Remember, a well-configured server attracts more players, building a larger community for your server.
AMX Mod X (AMXX) is another vital tool for server hosts. This plugin manager allows you to install and manage various game server modifications. Plugins can add new game modes, admin controls, or other gameplay enhancements. Proper use of AMX Mod X can turn your server into a unique gaming hub, attracting a wider range of players.
Lastly, remember that a server is only as good as its maintenance. Regular updates, monitoring server performance, and user feedback are key to keeping your CS 1.6 server popular among gamers. Whether you’re using a VPS, dedicated server, or a game server hosting service, regular maintenance is crucial. This holistic approach will help you successfully host a CS 1.6 server.
Optimizing Performance When Hosting a CS 1.6 Server
To ensure the smooth operation of your CS 1.6 server, optimization is key. To do so, monitor server loads and adjust resource allocation as needed. The hosting solutions you choose, such as a virtual private server, should offer scalability to handle sudden spikes in traffic. Typically, hosting accounts include a control panel that enables efficient resource management. Moreover, it is essential to regularly update your dedicated server or VPS to ensure you are running the latest versions of the operating system and server software. Proper optimization provides an excellent gaming experience and further cements your hosting business.
Community Recommendations for Hosting a CS 1.6 Server
The CS 1.6 community is extensive and active, and many experienced members provide valuable insights into hosting a CS 1.6 server. For instance, dedicated servers and game server hosting are often recommended for their reliable performance. These services are generally provided by a web hosting company, and there are numerous hosting accounts and reseller programs available. As for free game server hosting, while it may be a cost-effective solution, it may lack the performance and control offered by paid options.
Conclusion
This guide has walked you through the essential steps to host your server, including server types, system requirements, server setup, and performance optimization. Regardless of whether you opt for dedicated servers, virtual private servers, or game server hosting, maintaining a responsive and efficient CS 1.6 server will offer a rewarding gaming experience for the CS 1.6 community. Learning how to host a CS 1.6 server is a journey that starts with understanding the basics and culminates in mastering advanced server management.


0 Comments